If you’re looking for Windows tools for operating system repair, you’ve come to the right place. We’ve got a list of the top tools you can use to fix common issues on your computer and keep it running smoothly.
Whether you’re dealing with a slow computer, crashes, or the dreaded blue screen of death, these tools can help you diagnose and fix the problem quickly. So, let’s get started!
List of Windows Tools for Operating System Repair:
1. Windows Troubleshooter
Windows Troubleshooter is a built-in tool in the Windows operating system that can help you identify and fix common issues. It’s easy to use and can save you a lot of time and money in repair fees.
Ways to access the Windows Troubleshooter:
Method 1:
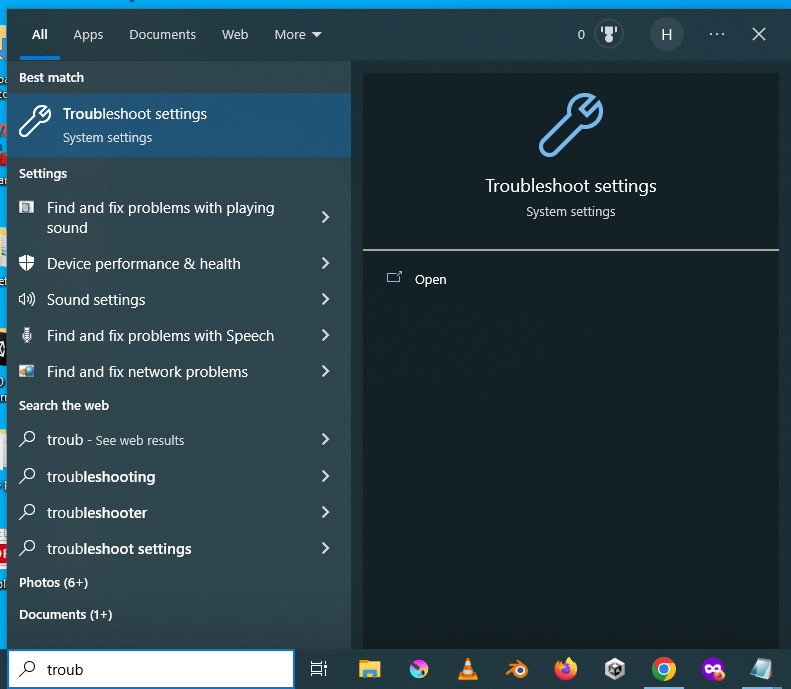
-To access the troubleshooter, simply type “troubleshoot” into the search bar, and select “troubleshoot settings.”
Method 2:
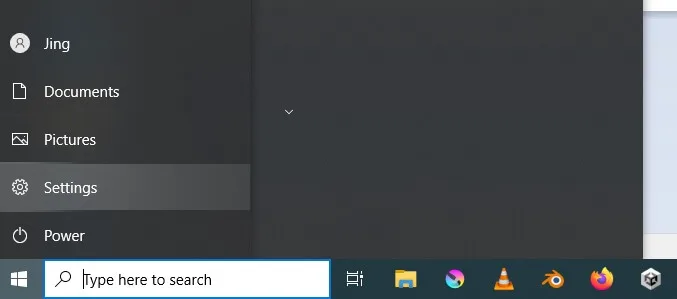
-Open the Windows Settings app by clicking on the Start menu and selecting “Settings” (gear icon).
-Click on “Update & Security” and then select “Troubleshoot” from the left-hand menu.
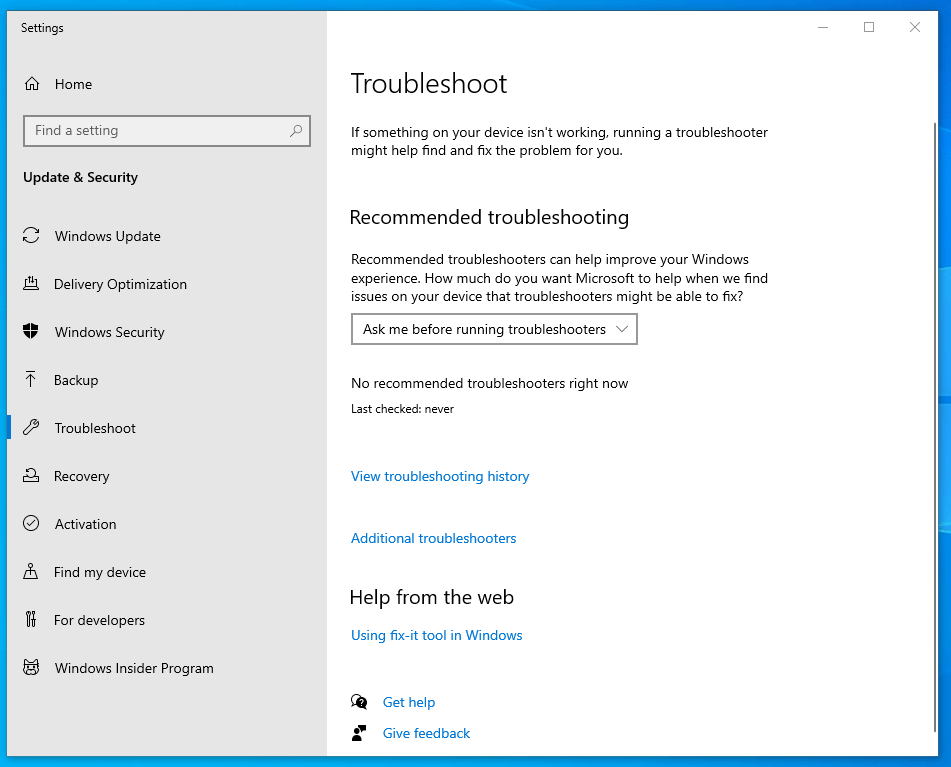
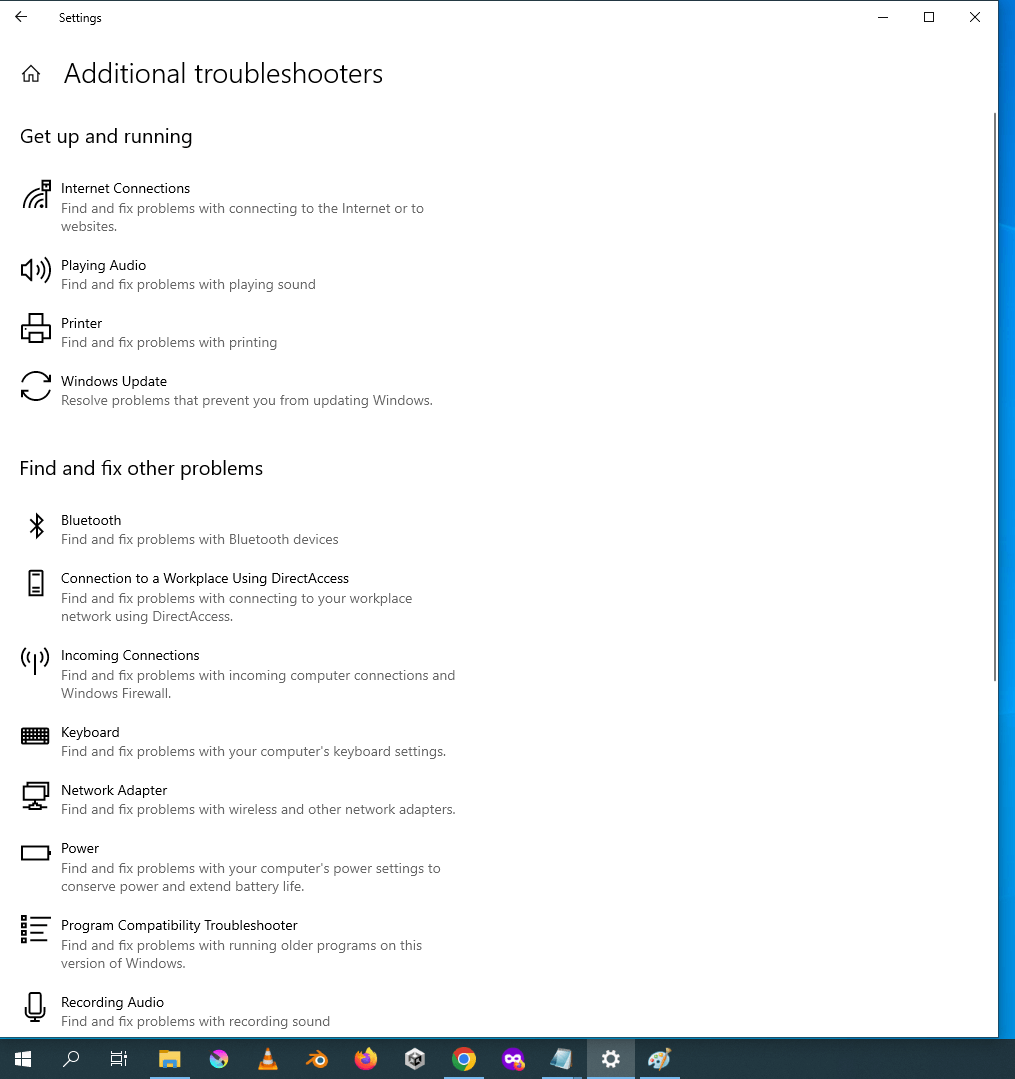
From there, you can choose from a variety of troubleshooting options, such as “hardware and devices,” “network adapter,” and “audio.”
How To Use Windows Troubleshooter:
- In the Troubleshoot settings, you will see a list of troubleshooters that you can run to diagnose and fix different issues. Select the troubleshooter that corresponds to the problem you’re experiencing, and click on the “Run the troubleshooter” button.
- Follow the on-screen instructions provided by the troubleshooter. It will guide you through the steps necessary to resolve the issue.
- Once the troubleshooter has finished running, it will provide you with a summary of the results. If the problem was fixed, you’ll be notified. If not, you can try running the troubleshooter again or seek additional help.
This tool can help you diagnose and fix issues with your computer’s hardware and software.
2. Windows Defender Offline
If you suspect that your computer has a virus or malware, using Windows Defender Offline can help. This tool allows you to scan your computer for viruses and other malware before your operating system boots up.
How to Access Windows Defender Offline:
-Make sure your computer is disconnected from the internet. This is important because Windows Defender Offline needs to run while your computer is offline in order to be effective.
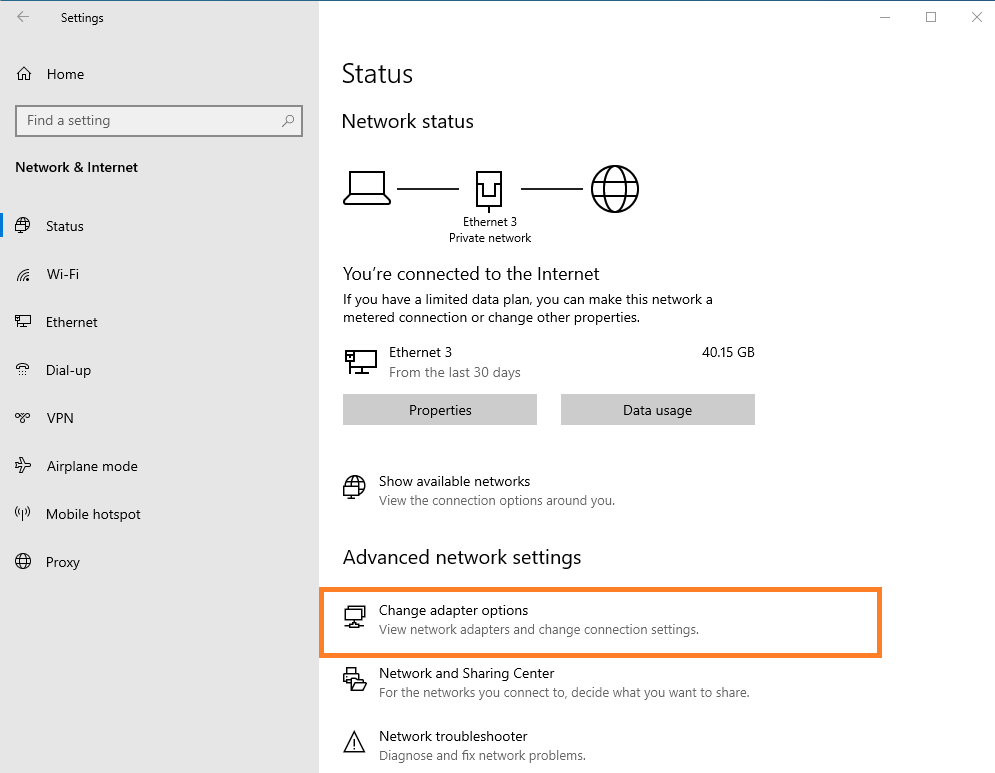
To Disconnect your Computer from the Internet:
You can either unplug your network cable from the back panel of your computer, or you can right-click on the network icon> Choose Open Network and Internet Settings>Click on Change Adapter Settings>Right-click on
Subtitle for This Block
Title for This Block
STEP 1
Subtitle for This Block
STEP 2

Subtitle for This Block
STEP 3
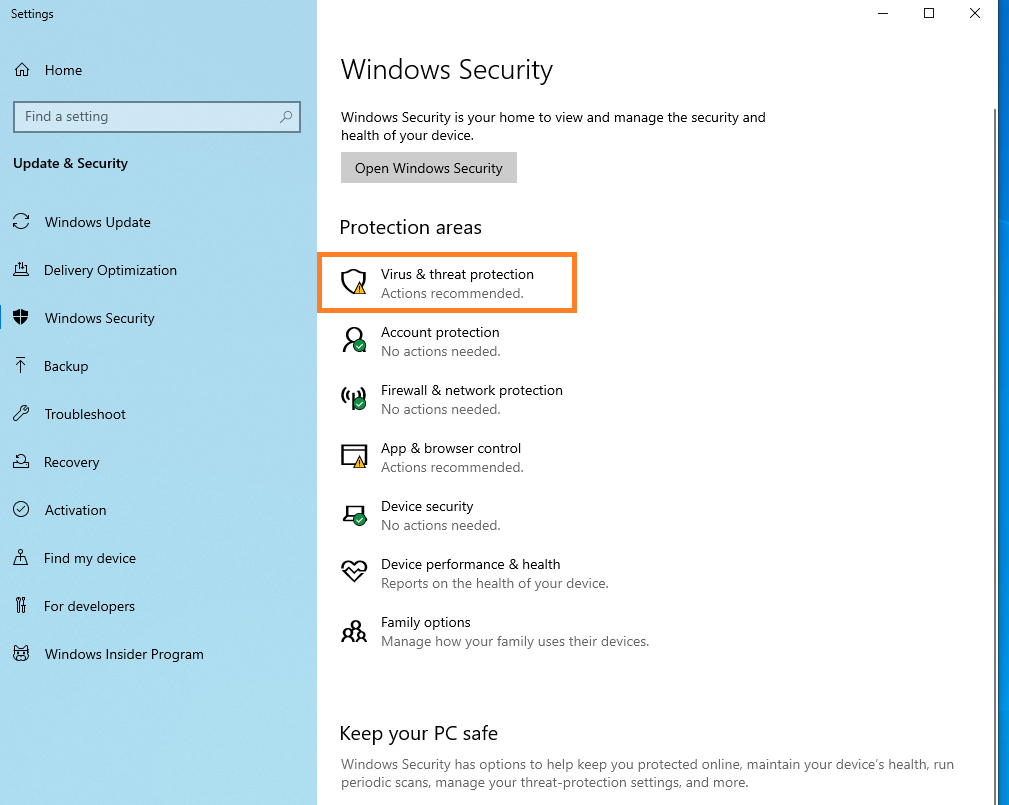
Open the Windows Security app by clicking on the Start menu and typing “Windows Security” into the search bar. Click on the app to open it.
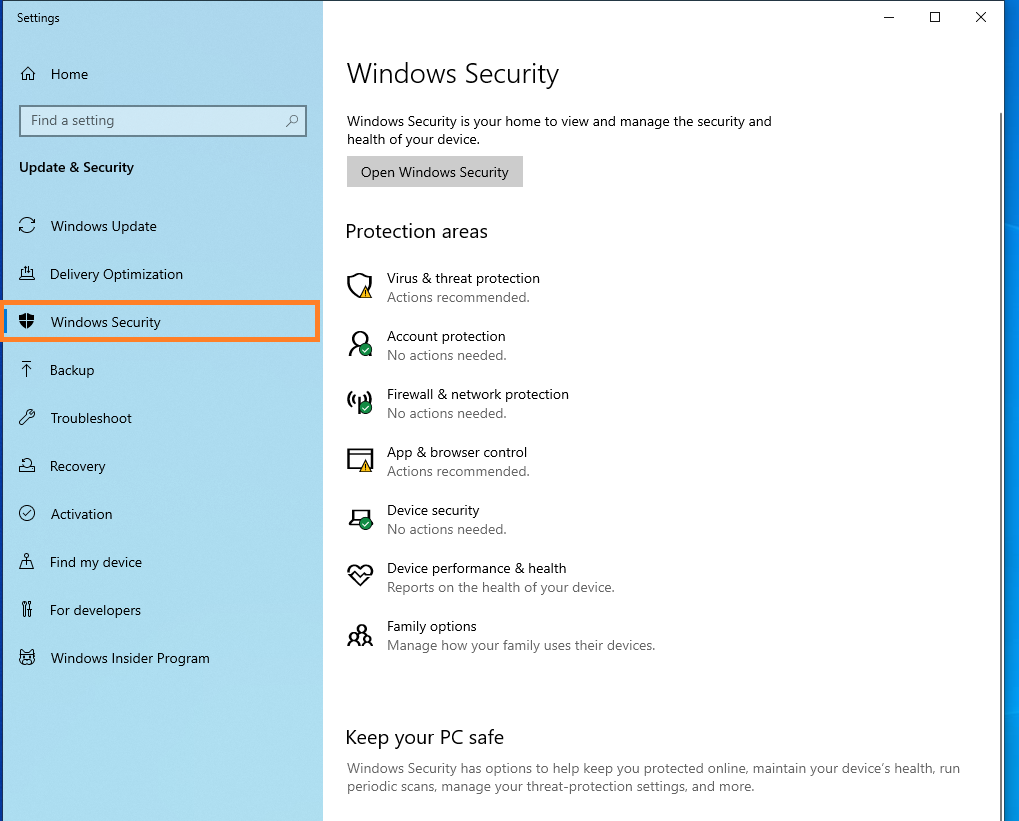
Once the app is open, click on the “Virus & threat protection” tab. Then, click on the “Scan options” link.
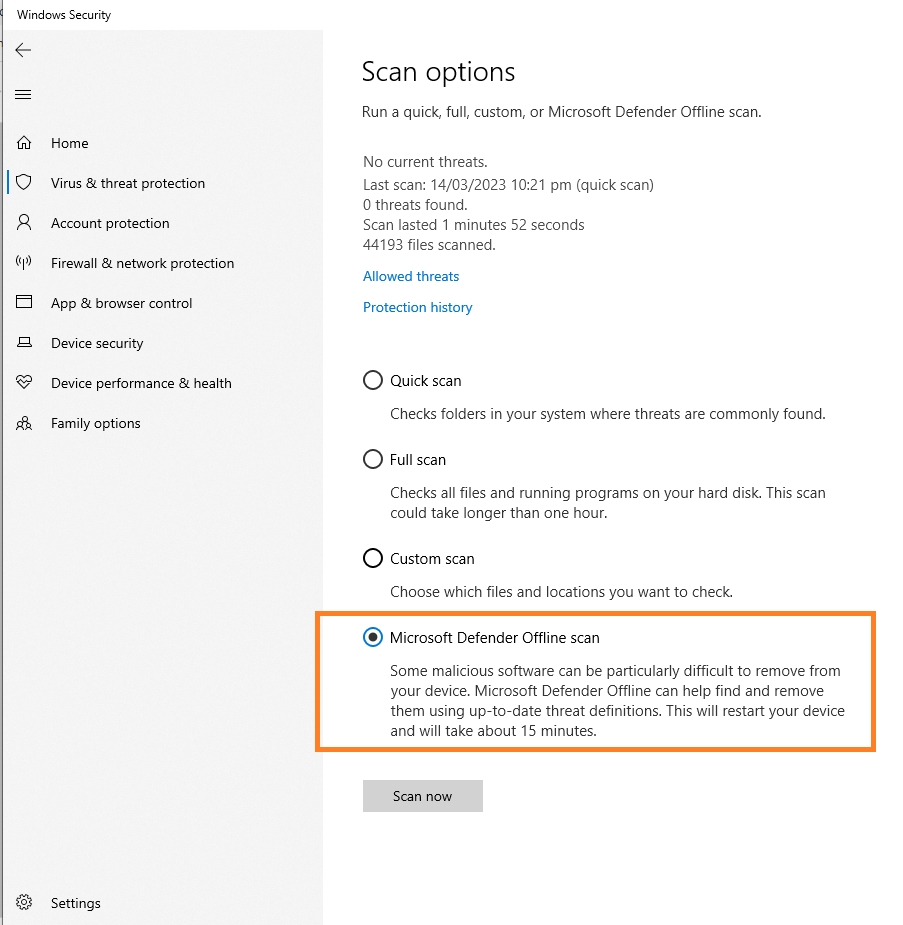
In the Scan options menu, select “Windows Defender Offline scan” and click on the “Scan now” button.
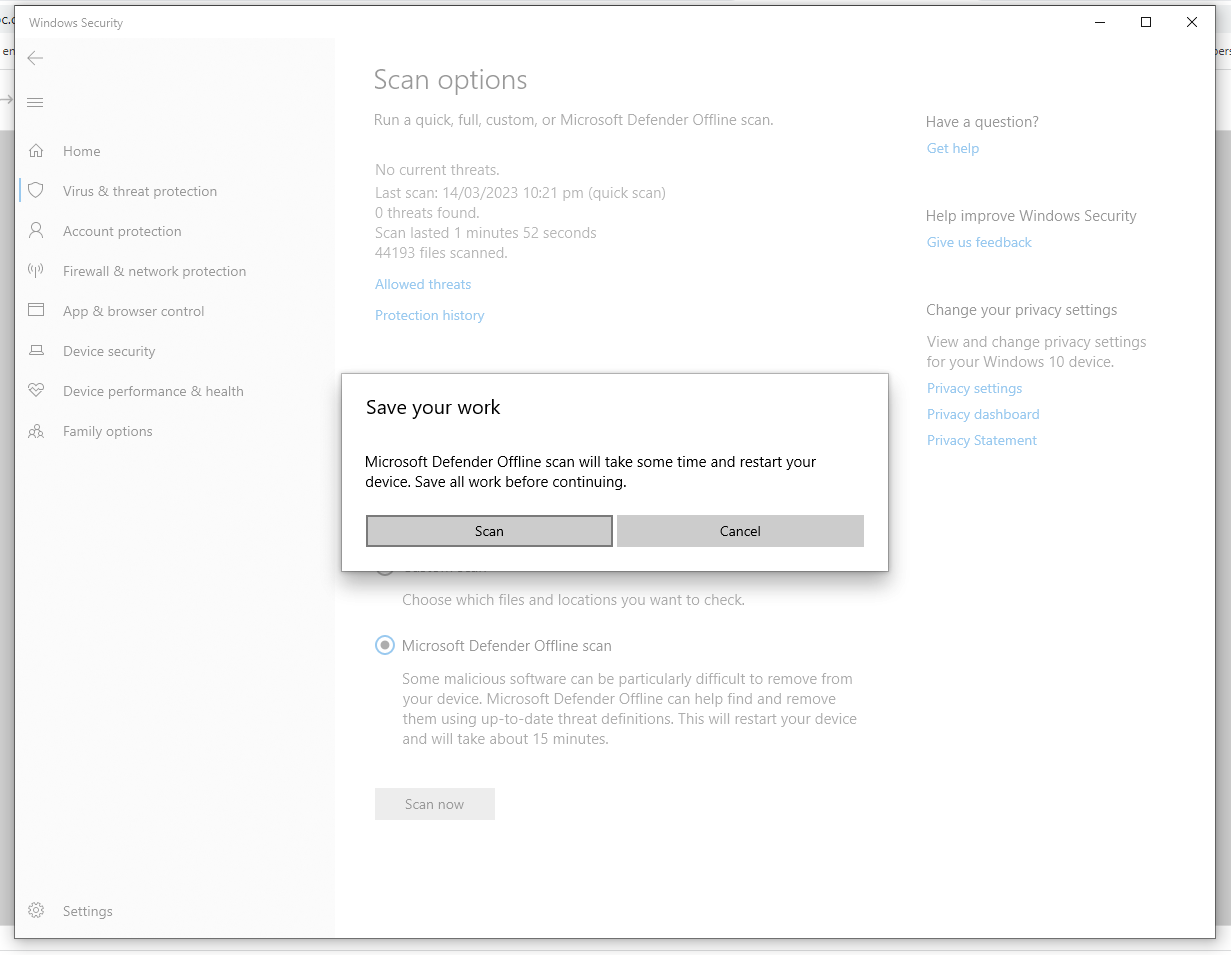
Windows will prompt you to save any unsaved work and close any open programs before proceeding with the scan. Click on the “Scan now” button to start the scan.
The scan may take some time to complete, depending on the size of your hard drive and the number of files on your computer. Once the scan is complete, Windows Defender Offline will let you know if any malware or viruses were found.
If malware or viruses were found, Windows Defender Offline will give you the option to remove them. Simply follow the on-screen instructions to remove any threats that were found.
Once the removal process is complete, you may be prompted to restart your computer in order to complete the removal process. If so, click on the “Restart now” button to restart your computer.
3. System File Checker
The System File Checker tool is another built-in tool in the Windows operating system that can help you fix corrupted system files. It’s a great tool to use if you’re experiencing issues with your computer’s performance or stability.
How to Use System File Checker(SFC)
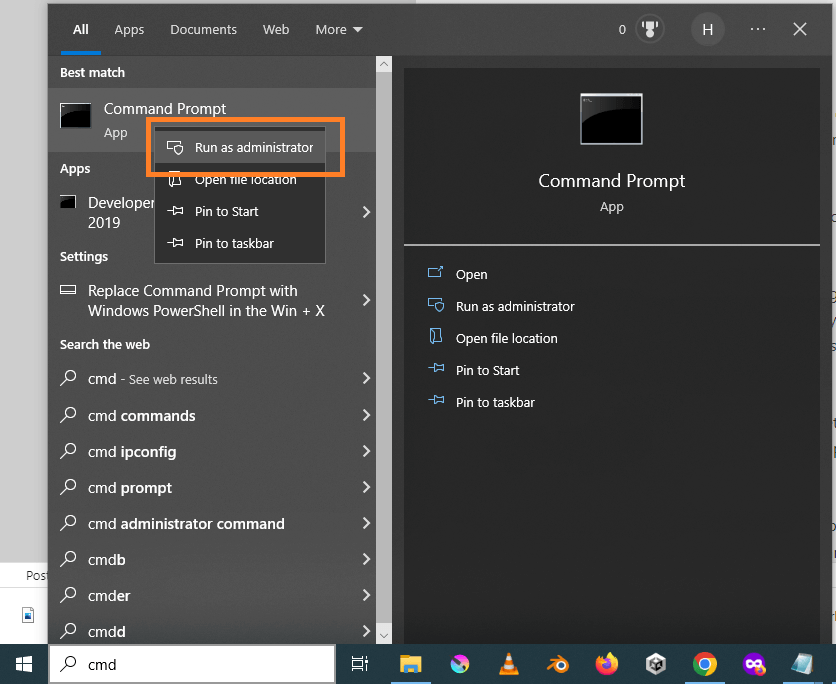
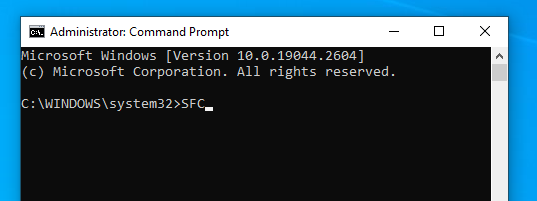
-Open the Command Prompt as an administrator. You can do this by clicking on the Start menu, typing “cmd” into the search bar, right-clicking on Command Prompt, and selecting “Run as administrator.”
-Once the Command Prompt is open, type “sfc /scannow” and press Enter. This will start the System File Checker scan.
-The scan may take some time to complete, depending on the size of your hard drive and the number of files on your computer.
During the scan, System File Checker will scan all protected system files and replace any corrupted or missing files with cached copies that are located in a compressed folder at %WinDir%\System32\dllcache.
-Once the scan is complete, System File Checker will let you know if any corrupted or missing files were found and repaired. If so, you may be prompted to restart your computer in order to complete the repair process.
-If System File Checker was unable to repair any corrupted or missing files, you can try running the scan again by typing “sfc /scannow” into the Command Prompt and pressing Enter.
You can also read this article to fix corrupted system file: Fixing Corrupted System Files – Easy Guide to Repair Windows Errors
-If you continue to have issues with corrupted or missing system files, you may need to perform a Windows repair or reinstallation.
If System File Checker can’t repair the files, it will provide a log file with information about the corrupted files.
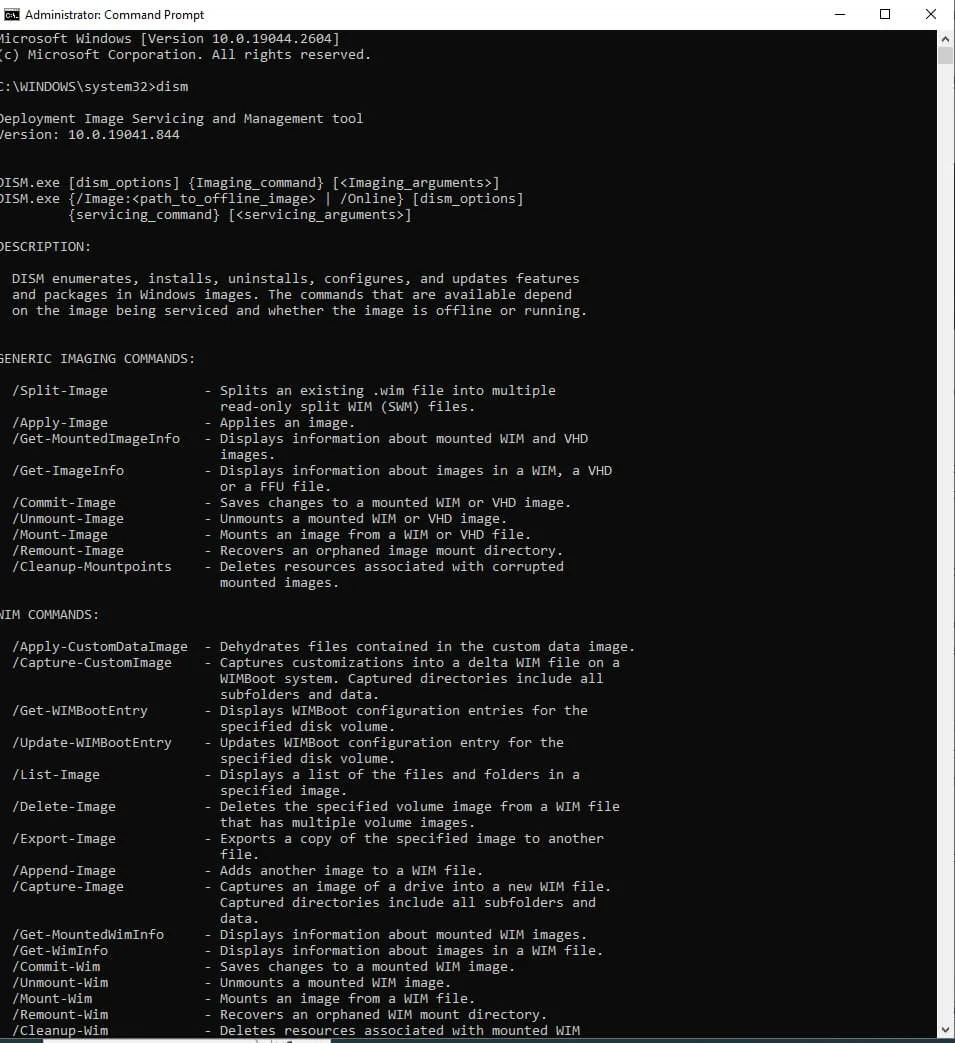
4. DISM Tool
If the System File Checker tool can’t repair corrupted system files, you can use the Deployment Image Servicing and Management (DISM) tool to repair them. DISM is a command-line tool that allows you to mount and service Windows images.
How to Use Windows Deployment Image Servicing and Management:
Open a command prompt with administrative privileges. To do this, click on the Start menu and search for “Command Prompt”. Right-click on the Command Prompt app and select “Run as administrator”.
- Open a command prompt with administrative privileges. To do this, click on the Start menu, search for “Command Prompt,” right-click on the Command Prompt app, and select “Run as administrator.”
- Type the following command and press Enter:
DISM /Online /Cleanup-Image /RestoreHealthThis command will scan your system for any corrupted files and attempt to repair them using Windows Update. Note that this process may take some time, so be patient and do not interrupt the process. - If the previous command fails to repair the corrupted files, you can use the following command to repair them using an installation image or an ISO file:
DISM /Online /Cleanup-Image /RestoreHealth /source:<path_to_installation_image_or_ISO_file>Replace “<path_to_installation_image_or_ISO_file>” with the path to your Windows installation image or ISO file. You can use either a physical installation disc or a downloaded ISO file. - Wait for the DISM tool to complete the repair process. Once it’s done, restart your computer to apply any changes made by the tool.
That’s it! By following these steps, you should be able to use the DISM tool to repair any corrupted system files on your Windows computer.
For a full list of DISM Commands and Functions Visit: Microsoft Knowledge Base for DISM tool
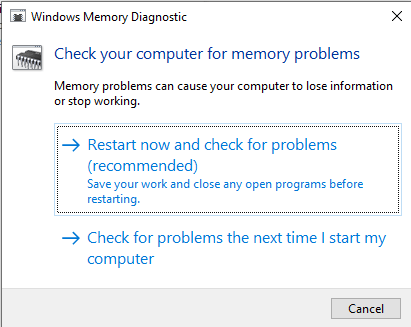
Windows Memory Diagnostic
If you’re experiencing frequent crashes or blue screens of death, it could be due to issues with your computer’s memory. The Windows Memory Diagnostic tool can help you diagnose and fix these issues.
How to Use Windows Memory Diagnostics Tool:
- Open the Start menu and search for “Windows Memory Diagnostics.” Click on the app to open it.
- Choose between two options: “Restart now and check for problems” or “Check for problems the next time I start my computer.” Select the option that’s most convenient for you.
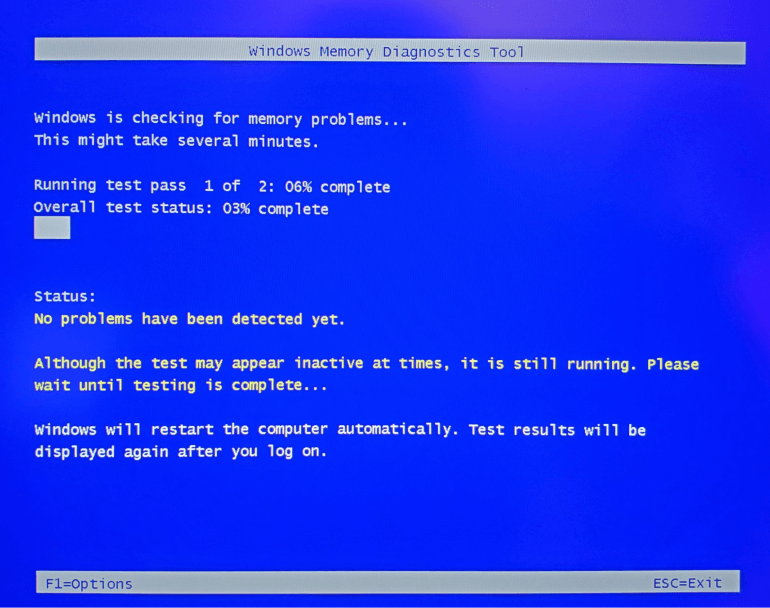
- If you choose the first option, your computer will automatically restart and the memory diagnostic tool will start running. If you choose the second option, you will need to restart your computer manually for the tool to run.
- The memory diagnostic tool will run several tests on your computer’s memory. This process may take several minutes to complete, depending on the size of your memory.
- Once the test is complete, your computer will automatically restart. If there are any errors found during the test, the Memory Diagnostics tool will display a message with information on what went wrong.
- If you want to view the results of the memory test after your computer has restarted, go to the Start menu and search for “Event Viewer.” Open the app and go to the “Windows Logs” folder, then select “System.” Look for any entries with “MemoryDiagnostics-Results” in the source column. This will show you the results of the memory test.
By following these steps, you should be able to use the Windows Memory Diagnostics tool to check for any problems with your computer’s memory. If any errors are found, you may need to replace the faulty memory module to fix the issue.
Summary:
Using these top windows tools for operating system repair can help you fix common issues on your computer and keep it running smoothly. Whether you’re a computer repair professional or just a casual user, these tools are essential to have in your arsenal.