
Recover Permanently Deleted Files in Windows 10
Have you ever deleted a file in Windows 10 and then realized that you needed it back?
Or worse, have you ever permanently deleted a file, either accidentally or intentionally, only to realize later that you needed it? If so, don’t panic – there is still hope for recovering your lost files.
We’ve all been there: that sinking feeling in your stomach when you realize you’ve deleted a file you really need.
Whether it was an important work document, a cherished family photo, or a critical system file, losing data can be a stressful experience.
But before you give up hope and resign yourself to starting over from scratch, there are a few things you can try to recover your deleted files.
In this article, we’ll show you how to recover permanently deleted files in Windows 10.
Introduction
The first thing you should know is that when you delete a file in Windows, it isn’t actually deleted right away.
Instead, Windows moves the file to the Recycle Bin, where it can be easily restored if necessary.
However, if you delete a file by using the Shift + Delete keys, or if you empty the Recycle Bin, the file is considered permanently deleted. But even then, the file isn’t really gone – at least, not yet.
The space that the file occupied on your hard drive is now marked as available for use, but until that space is overwritten with new data, the file is still there, waiting to be recovered.
H1: How to Recover Permanently Deleted Files in Windows 10
Method 1: Check the Recycle Bin
The first and easiest method to try when recovering deleted files is to check the Recycle Bin.
If you realize you have deleted a file by mistake, the first and easiest method to try is to check the Recycle Bin.
You can open the Recycle Bin by double-clicking on its icon on the desktop or by opening Windows Explorer and typing “Recycle Bin” in the address bar.
Once you have opened the Recycle Bin, look for the file or folder you want to restore. You can sort the items in the Recycle Bin by name, date deleted, or size to make it easier to find what you’re looking for.
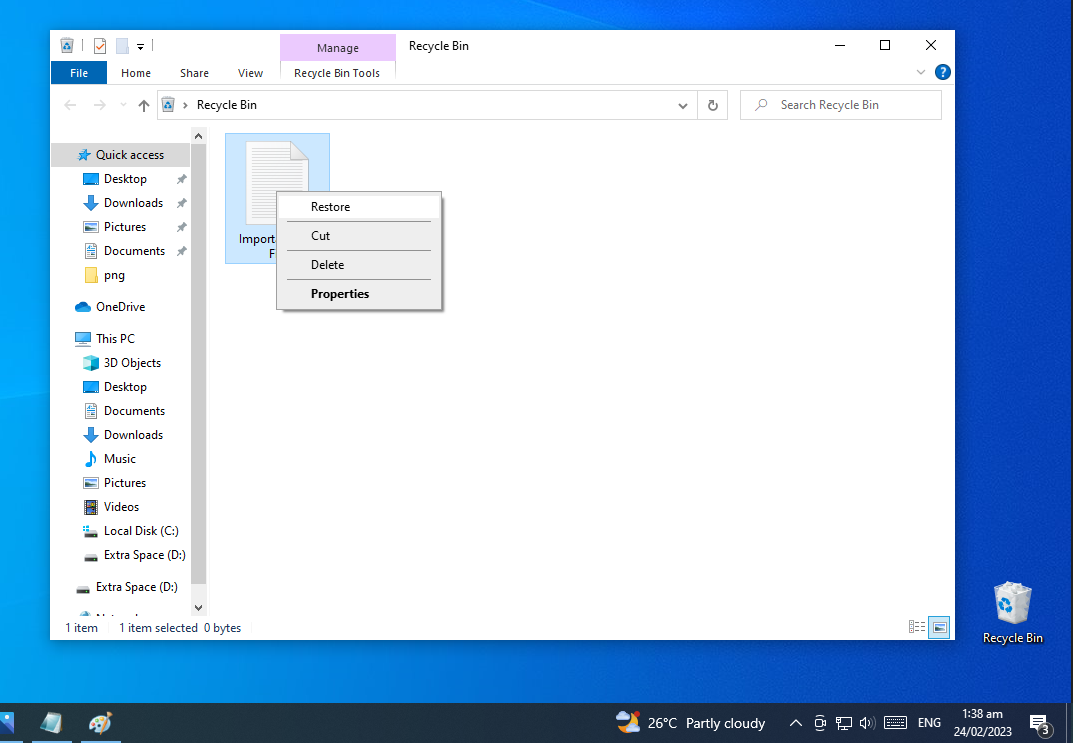
Once you have found the file or folder, right-click on it and select “Restore”. This will return the file or folder to its original location on your computer.
If the file or folder you want to recover is not in the Recycle Bin, it may have been permanently deleted from the system, or the Recycle Bin may have been emptied.
In this case, don’t worry – there are still other methods you can try. For example, you can use file recovery software that scans your computer’s hard drive for deleted files and attempts to recover them.
It is important to note that the chances of successfully recovering a deleted file decrease the longer you wait to attempt recovery, as the file may be overwritten by new data on your computer’s hard drive.
Therefore, it is best to try to recover a deleted file as soon as possible after it has been deleted.
Method 2: Use File History
If you’ve enabled File History in Windows 10, you may be able to recover your deleted files that way.
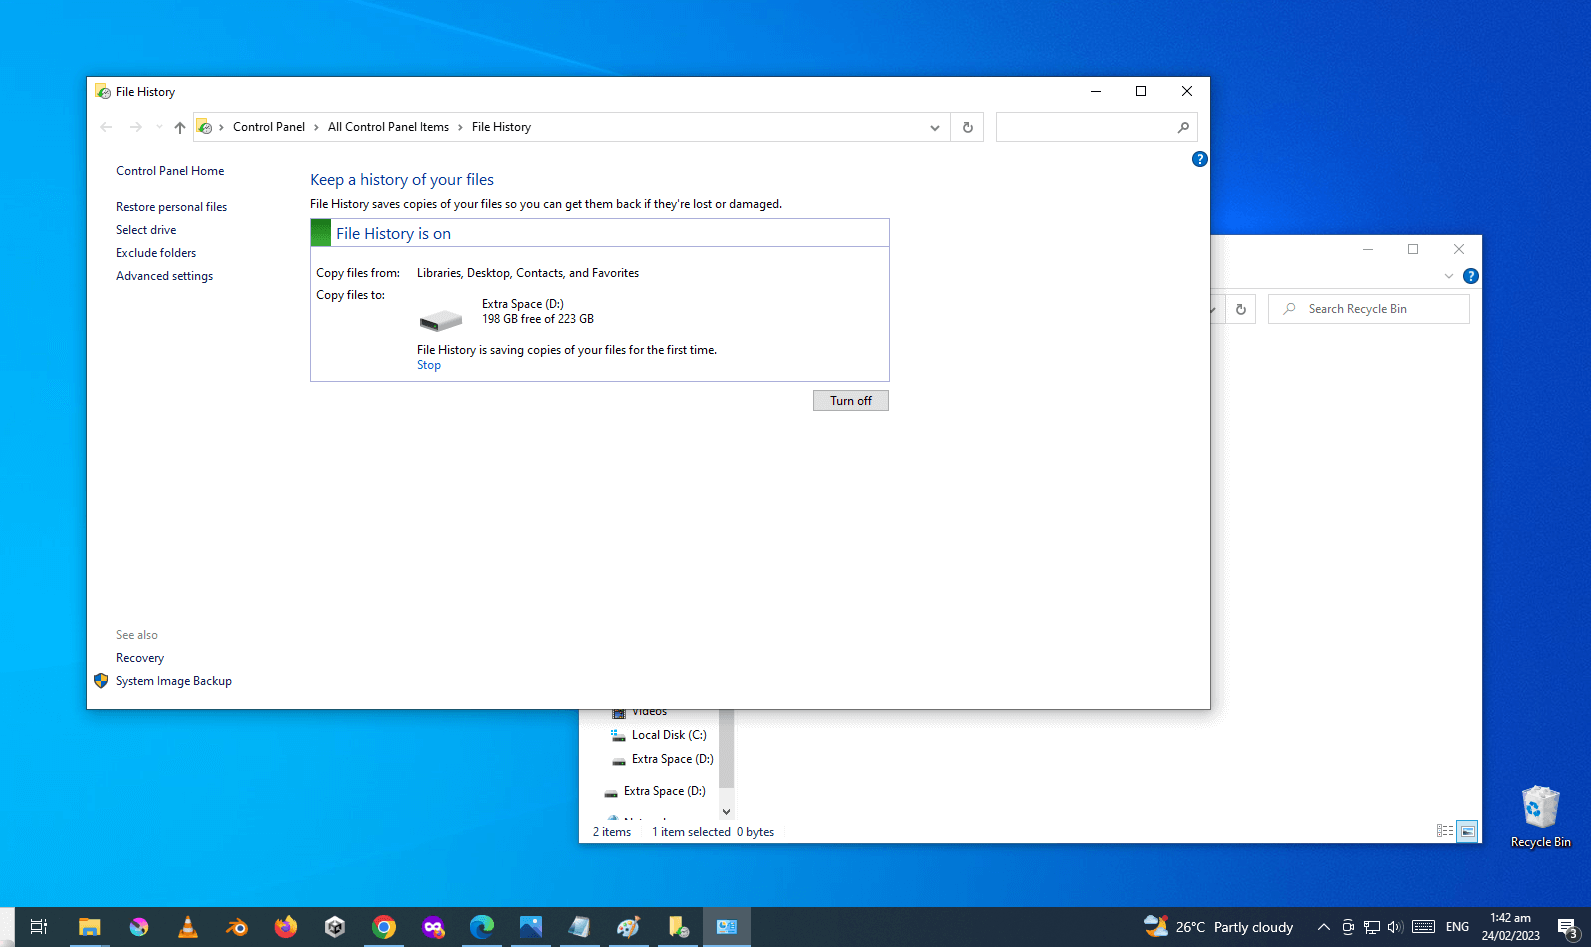
Windows has a feature called File History that allows users to automatically backup files stored in specific folders on their computer. This feature is particularly useful for recovering files that have been accidentally deleted, modified, or corrupted.
To check if a previous version of the deleted file is available through File History, you can open File Explorer and navigate to the folder where the deleted file was stored. Then, click the “History” button on the toolbar.
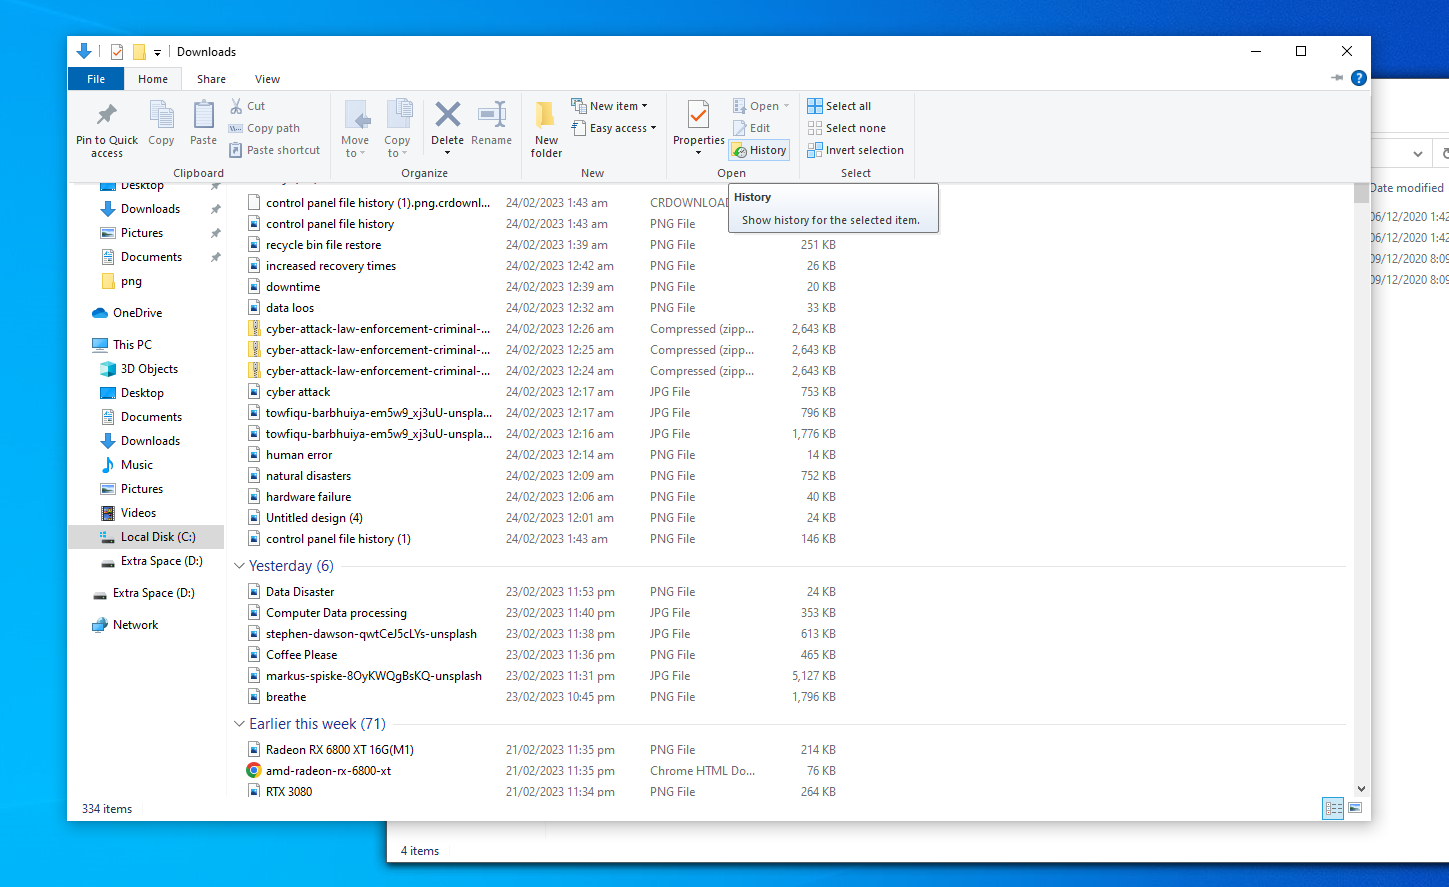
If File History is enabled for that folder, you will see a list of previous versions of the file, along with the date and time they were saved. You can use the arrows on the right side of the screen to navigate through the different versions.
Once you find a version of the file you want to recover, simply select it and click “Restore”. The file will be restored to its original location on your computer.
It’s important to note that File History is only available on Windows 8 and later versions of Windows. Additionally, it must be enabled and configured before you can use it to recover deleted files. If you haven’t already done so, it’s a good idea to check the settings for File History to make sure it is enabled and backing up the folders that contain important files.
Method 3: Use a Data Recovery Tool
If the above methods don’t work, don’t worry – there are still more options. You can use a data recovery tool to scan your hard drive and look for deleted files.
There are many data recovery tools available, both free and paid, but some of the most popular ones include Recuva, EaseUS Data Recovery Wizard, and Disk Drill.
Simply download and install the tool of your choice, then follow the instructions to scan your hard drive and recover your deleted files.
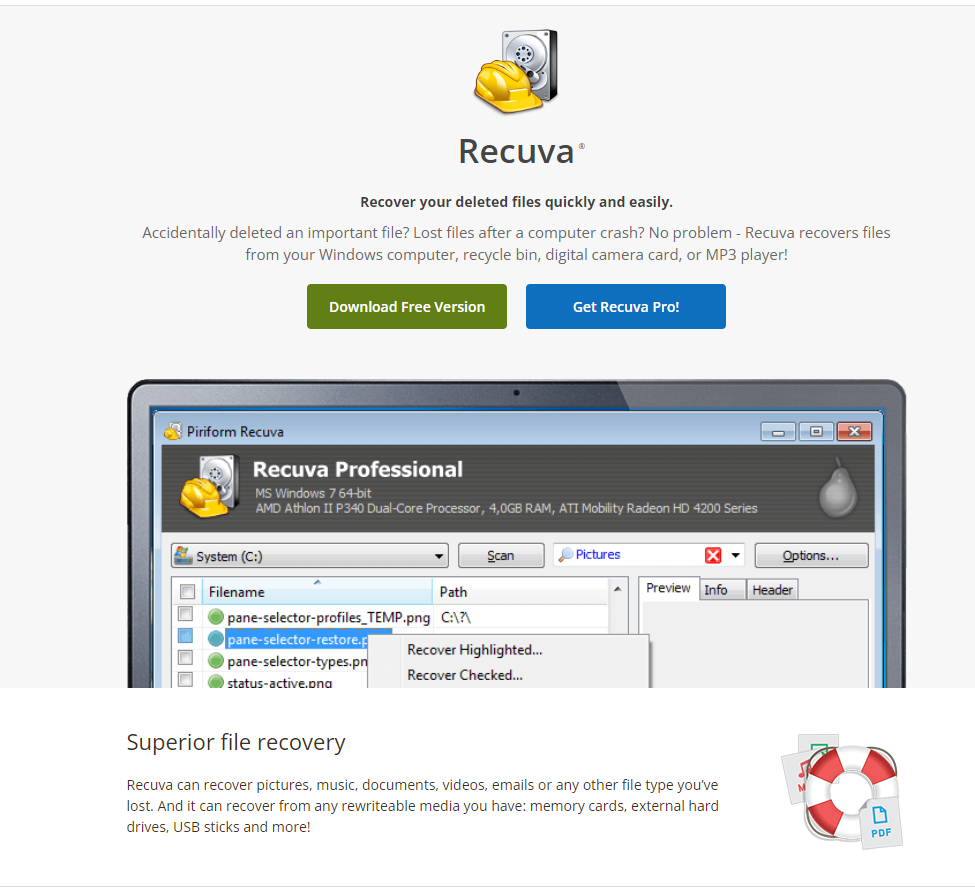
Here are the steps to use Recuva to recover deleted files:
- Download and install Recuva from the official website.
- Launch Recuva and select the type of files you want to recover. You can choose from a list of file types or select “All Files” if you are not sure what type of file you need to recover.
- Select the location where the file was stored before it was deleted. You can choose to scan your entire computer or a specific drive or folder.
- Click “Scan” to start the scanning process. Recuva will scan the selected location and display a list of recoverable files. You can use the search box to find a specific file if necessary.
- Once the scan is complete, you can preview the files to confirm that they are the ones you want to recover. You can do this by selecting a file and clicking the “Preview” button. This will open a preview window where you can view the contents of the file.
- Select the files you want to recover by checking the box next to each file. You can also select all files by checking the box next to “Filename”.
- Click the “Recover” button to start the recovery process. You will be prompted to select a location where the recovered files will be saved. It’s important to choose a different location than where the files were originally stored to avoid overwriting any existing data.
- Wait for the recovery process to complete. Once the files are recovered, you can open them to make sure they are intact and usable.

How to use EaseUS Data Recovery Wizard to recover deleted files:
- Download and install EaseUS Data Recovery Wizard from the official website.
- Launch the software and select the location where the deleted files were stored. You can choose to scan your entire computer or a specific drive or folder.
- Click “Scan” to start the scanning process. EaseUS Data Recovery Wizard will scan the selected location and display a list of recoverable files. You can use the search box to find a specific file if necessary.
- Once the scan is complete, you can preview the files to confirm that they are the ones you want to recover. You can do this by selecting a file and clicking the “Preview” button. This will open a preview window where you can view the contents of the file.
- Select the files you want to recover by checking the box next to each file. You can also select all files by checking the box next to “Filename”.
- Click the “Recover” button to start the recovery process. You will be prompted to select a location where the recovered files will be saved. It’s important to choose a different location than where the files were originally stored to avoid overwriting any existing data.
- Wait for the recovery process to complete. Once the files are recovered, you can open them to make sure they are intact and usable.
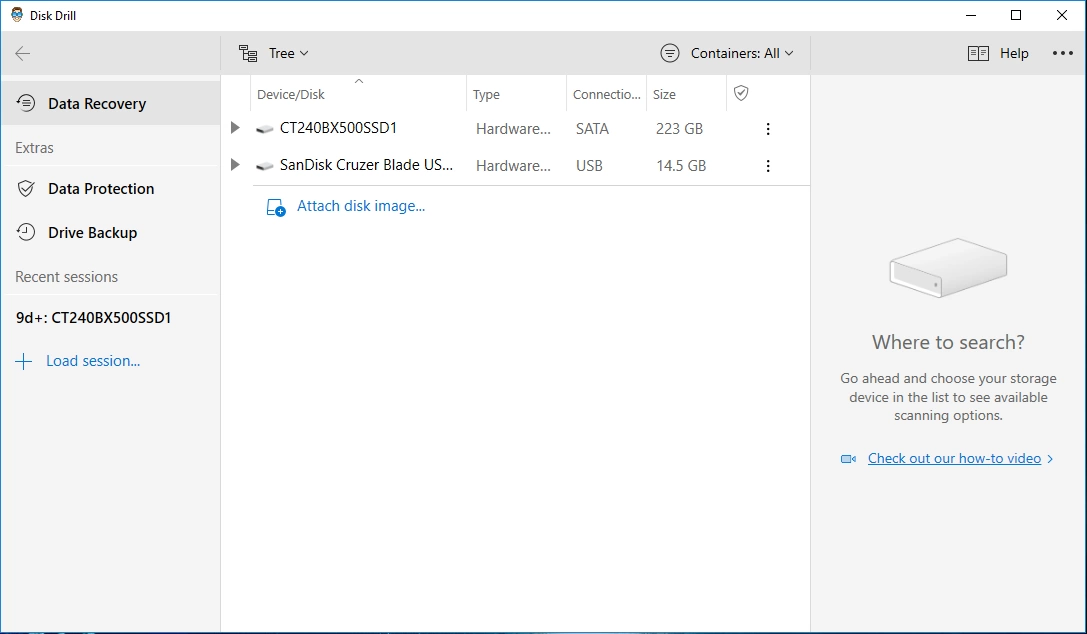
Steps to use Disk Drill to recover deleted files:
- Download and install Disk Drill from the official website.
- Launch Disk Drill and select the drive where the deleted files were stored.
- Click the “Search for lost data” button to start the scanning process. Disk Drill will scan the selected drive and display a list of recoverable files.
- Once the scan is complete, you can preview the files to confirm that they are the ones you want to recover. You can do this by selecting a file and clicking the “Preview” button. This will open a preview window where you can view the contents of the file.
- Select the files you want to recover by checking the box next to each file. You can also select all files by checking the box next to “Filename”.
- Click the “Recover” button to start the recovery process. You will be prompted to select a location where the recovered files will be saved. It’s important to choose a different location than where the files were originally stored to avoid overwriting any existing data.
- Wait for the recovery process to complete. Once the files are recovered, you can open them to make sure they are intact and usable.
Disk Drill also has a feature called “Recovery Vault” that can help protect your files from accidental deletion. When enabled, Recovery Vault tracks deleted files and makes it easier to recover them if needed.
For More on Data Disaster Recovery Read this Article: Data Disaster Recovery
Conclusion
Losing important files can be a frustrating and stressful experience, but it doesn’t have to be the end of the world.
You can often recover deleted files in Windows 10, even if they were permanently deleted, with the right tools and a little bit of know-how.
Remember to always check the Recycle Bin first, and if that doesn’t work, try using File History or a data recovery tool.
With a little bit of luck and persistence, you can often recover your lost files and get back to work in no time.